For many households, a frequent issue in attics is mold growth. Often it results from low ventilation, leaks of moisture, or high humidity. On wooden beams, insulation, and other surfaces, mold can grow and create an ugly and maybe dangerous surroundings. Mold can, regrettably, cause major health problems. Particularly in people with asthma or compromised immune systems, exposure to mold can cause skin irritation, allergies, and respiratory problems. For this reason, mold eradication calls for careful and efficient methods. Emphasizing the need of safety and the limits of do-it-yourself (DIY) techniques, this tutorial will walk over how to safely remove mold from your home’s attic.
Assessing the Mold Situation
You have to evaluate the state of mold in your attic before beginning any remediation. This is how to accomplish it:
Visual Inspection
Start by looking at your attic visually. Search surfaces for evidence of mold growth—black, green, or white stains. Usually first showing as fuzzy spots or streaks, mold is If you find spots of discolouration, closely inspect them for further mold indicators. If you also smell musty, it could indicate that mold is present even though you cannot see it. Mold spewes spores that might smell bad.
Identifying the Source of Moisture
It is then imperative to find the source of moisture possibly driving the mold development. Typical sources are:
- Roof leaks: Look over your roof for cracked shingles, damage that can let water soak in.
- Plumbing issues: Look for leaks in attic or wall-mounted pipes or fixtures. Mold can find a suitable habitat even from a minor leak.
- Condensation: High attic humidity could cause condensation on surfaces, particularly in response to temperature swings.
Take great care to look at every possible moisture source. Deal with leaks and dampness right away to stop more mold development.
Determining the Extent of the Mold
Analyze last the extent and degree of the mold invasion. Is it a small area on a wooden beam, or has it spread across a large section of the attic? Understanding the depth of the problem will help you decide if you can tackle the removal yourself or whether you need to call in a professional.
If you suspect hidden mold behind walls or insulation, consider hiring an expert who can conduct a complete inspection and testing. They can assist detect locations afflicted by mold that you may not see with a visual inspection.
Safety Precautions
Safety should always come first when dealing with mold removal. Here are some key steps to take:
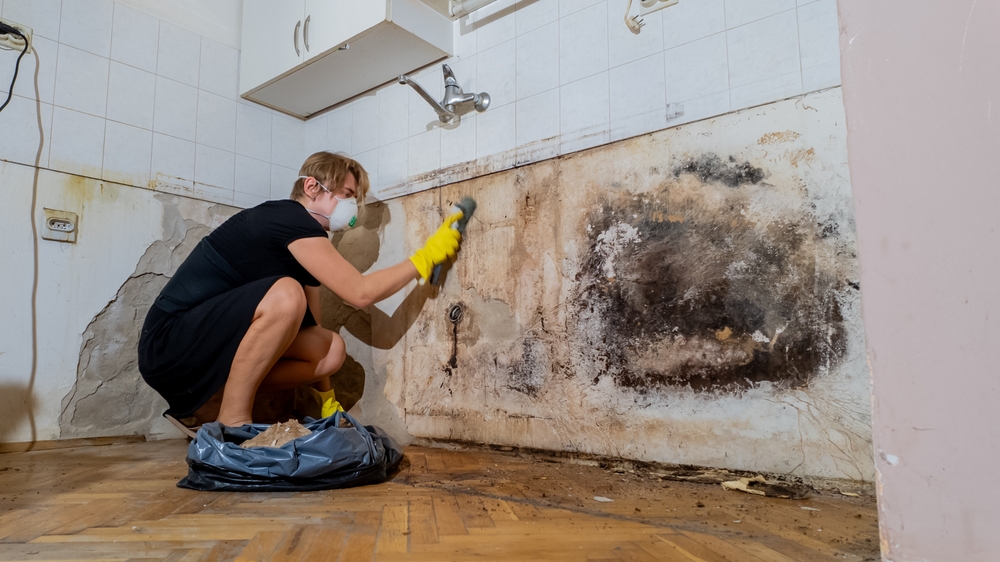
Personal Protective Equipment (PPE)
Wear the required PPE before beginning any mold removal. This comprises:
- N95 respirator: The N95 respirator will assist you against inhaling mold particles. See whether it fits tightly over your mouth and nose.
- Gloves: Use throw-away gloves to guard your hands from cleaning agents and mould. Given their chemical resistance, nitrile gloves make a solid option.
- Eye protection: Put on protective goggles to guard against cleaning products or mold spores getting in your eyes. Select goggles with a good seal and fit for you.
- Long-sleeved clothing and long pants: Covering your skin lowers your chance of allergic responses or irritation. For more protection, think about donning throw-away coveralls.
Ventilation
Make sure your attic is adequately ventilated throughout the cleansing. To let fresh air flow, open windows and doors. Help move air out of the attic with fans, if at all feasible. Good ventilation helps to lower airborne mold spores and moisture, therefore improving the safety of the cleanup operation.
Avoid Disturbing Mold
Take care not to too drastically change the mold while you clean. Disturbing mold can spew spores into the atmosphere that cause health problems. See a specialist if you see a lot of mold or in difficult-to-reach spots. Their tools and knowledge allow them to safely manage bigger infestations.
DIY Mold Removal Techniques (for Small, Superficial Mold)
Try these do-it-yourself mold removal methods if you evaluated the mold condition and decided it’s a tiny, under control area.
Cleaning Supplies
Before beginning, compile the required cleaning agents:
- Spray bottle
- Scrub brush
- Mild detergent
- Disinfectant (such as hydrogen peroxide or a commercial mold remover)
- Bucket
- Towels or rags
Cleaning Process
- Prepare the Area: Make sure all of your materials are ready before you begin. Make sure the attic is well-ventilated, and wear your PPE.
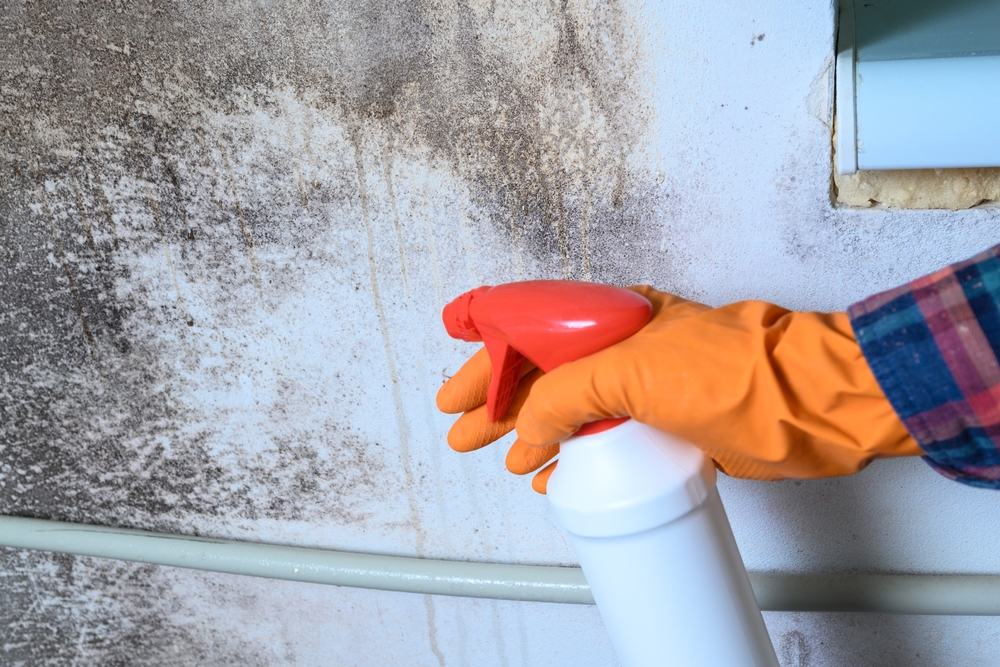
- Mix Cleaning Solution: In the spray bottle, mix a solution of mild detergent and water. A usual ratio is one part detergent to ten parts water. Without compromising the surfaces, this will help to disrupt the pattern.
- Spray the Affected Area: Lightly clean the moldy surface with the sprayer filled with affected area solution. Steer clear of soaking it; too much moisture could aggravate the issue. Let the solution sit for a few minutes to help to penetrate the mold if the surface is quite contaminated.
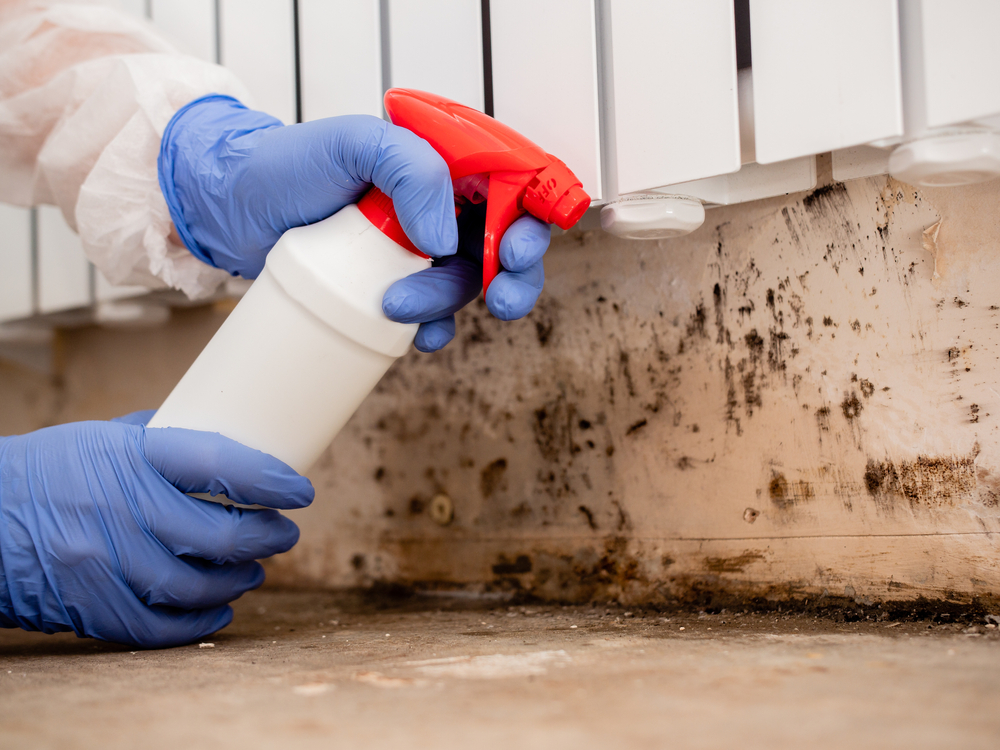
- Scrub the Mold: Till the mold is eliminated, carefully scrape the moldy section with the scrub brush. Take great care not to compromise the surface under. For tough stains, you might have to use more cleaning solution and give another scrub-through.
- Disinfect the Area: Apply a disinfectant to the area following cleansing to eradicate any last of the mold spores. For optimal results follow the product’s directions. Make sure the disinfectant appropriate for the surface you are cleaning.
- Dry Thoroughly: Make sure the cleansed area dries totally. To aid in the drying process’s speed, run dehumidifiers or fans. Make sure there is no moisture left since damp places could cause mold to grow once more.
Limitations of DIY
Although do-it-yourself approaches can be successful for minor infestations, they have certain limits. Large infestations, hidden mold, or mold on porous surfaces like drywall call for different approaches than do DIY mold removal. See a professional also if you have allergies or health issues to be safer. See a professional if you believe a more major issue exists.
When to Call a Professional
Mold infestations occasionally can be hidden or widespread. These indicators point to the need of consulting a qualified mold remediation expert:
Large Infestations
You should consult a professional if you find significant mold development over a sizable area. Using specific tools, a professional can evaluate the matter and safely remove the mold. They can also find the moisture source and suggest ways to stop mold from developing going forward.
Professional Expertise
Using a professional mold remediation company has a lot of advantages. They possess the knowledge to properly spot and handle mold. Professionals also use specialist tools to guarantee complete and safe removal of the mold, so preventing its return. Their background helps them to manage difficult circumstances that might overwhelm a do-it-yourself approach.
Insurance Claims
If mold removal leads to significant damage in your home, your insurance may cover the costs. A professional remediation agency can help document the damage and aid you with the claims procedure. Having a skilled staff manage the problem can bring peace of mind and assist you negotiate insurance procedures.
Mold Prevention
Once you’ve dealt with mold, it’s crucial to take actions to prevent it from returning. Here are some strategies to consider:
Improve Ventilation
Good ventilation is crucial to preventing mold formation. Ensure that your attic has proper ventilation systems, such as vents, fans, and soffits. These allow air to move freely, preventing moisture buildup. Installing a continuous ridge vent together with soffit vents helps boost airflow in your attic, helping to keep it dry.
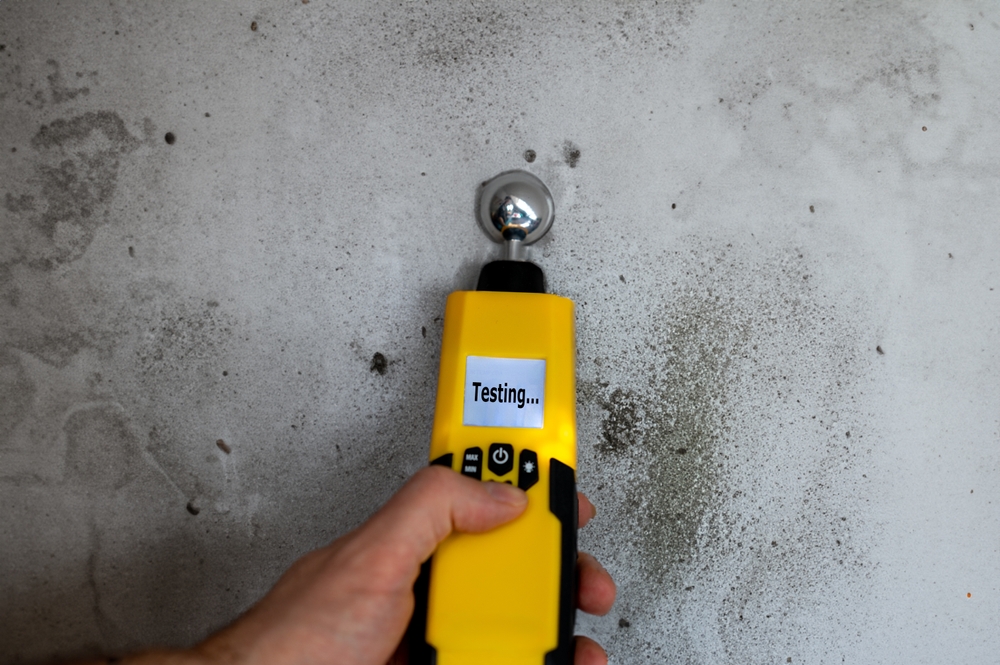
Moisture Control
Address any potential moisture sources. Check your roof often for leaks or plumbing problems; take quick care of them. If your attic is typically humid, run dehumidifiers. Maintaining indoor humidity levels below 60% is absolutely vital to stop mold development. The humidity in your attic can be tracked with a hygrometer.
Regular Inspections
Develop the practice of routinely looking for indications of mold development or moisture problems in your attic. Early identification lets you address issues before they become major. Look for discoloration, wet areas, or odd smells; if you detect anything suspicious, act right away.
Insulation and Air Sealing
Correct insulation can help stop attic condensation. Make sure your attic is properly insulated so that warm, moist air won’t rise and condense on colder surfaces. Additionally, sealing any air leaks around vents, pipes, and wiring can help reduce moisture problems.
Conclusion
In conclusion, safely eliminating mold from your attic takes careful preparation and execution. Prioritize safety and be aware of the limitations of DIY mold removal. It’s crucial to address the root source of mold growth to prevent it from reoccurring. See a qualified mold remedial specialist for major infestations or health issues. Protecting your house and health should always be your main priority.
Remember that mold removal is not just about cleaning; it’s about creating a safe and healthy living environment. Preventing future mold problems and maintaining your attic free from dangerous mold development depends on your taking preventative actions.
Philadelphia Restoration Services
https://www.google.com/maps?cid=3399342399556699153
+1 267 668 0013
https://philadelphiarestorationservices.com/